I decided to repair the Travis CI build. What started as a small fix end up as setting up the whole automatic release system connected with GitHub releases. It sounds really cool, but the truth is that the electron-builder provided everything what we need. Then our task is “only” to set up everything correctly. So, today I will give you a step by step guide.
Electron Builder
First thinks first, we have to install the electron-builder which allows us to create installers for all platforms.
npm install electron-builder --save-dev
After this simple install we can start by updating the package.json file. We can start by adding two scripts dist and postinstall. The postinstall isn’t necessary as long as you have only one package.json file. The dist should include any additional preprocessing (I have to run Webpack) and the build itself which creates the packages.
The postinstall should stay as it is, but you can change the npm run build by your own preprocessing in the dist. If we want automatic publishing, we have to add --publish onTagOrDraft which will create the draft release (read more about it here).
Another thing which we have to add in package.json is whole new build setting.
There shouldn’t be a lot of troubles in this section, so I will explain only the tricky parts (full documentation). The win, dmg and linux relate to certain platforms and you can set here the target package type and a few other things. If you want automatic updates you should use squirrel instead of nsis, but squirrel supports only --x64 build. In files you have to provide all files that have to be included in order to run your app (In dist/ folder I have the bundle.js produced by Webpack).
Last thing which I add is directories which specify the output directory. You also have to include the name, email and url under author option.
One more and last thing before setting the AppVeyor and Travis CI are icons. All icons should be provided in the build folder. I recommend using tool as https://iconverticons.com/online for creating all icon formats and resolutions (there are also other options, for example: https://www.websiteplanet.com/webtools/favicon-generator)
AppVeyor and Travis CI
You may think that we don’t need both Travis CI an AppVeyor. However, we want to build packages for three different platforms, so we have to use AppVeyor for Windows and Travis CI for Linux and OS X builds. In this tutorial I expect that you already registered and connected them with your repo.
AppVeyor
Here is the simplified version (including everything necessary) of my appveyor.yml file.
The nice thing about our npm run dist script is that it builds package for the current platform, so we don’t need any additional settings. The only thing which you have to change here is the GH_TOKEN. To generate this token you have to visit the https://github.com/settings/tokens and create token with at least ‘public_repo’ permission. Before publishing this token you have to encrypt it using: https://ci.appveyor.com/tools/encrypt and then place it in GH_TOKEN. It should look something like this: fK836CflhDBugnKO8/6bb/97NGIsR/E8Y3e
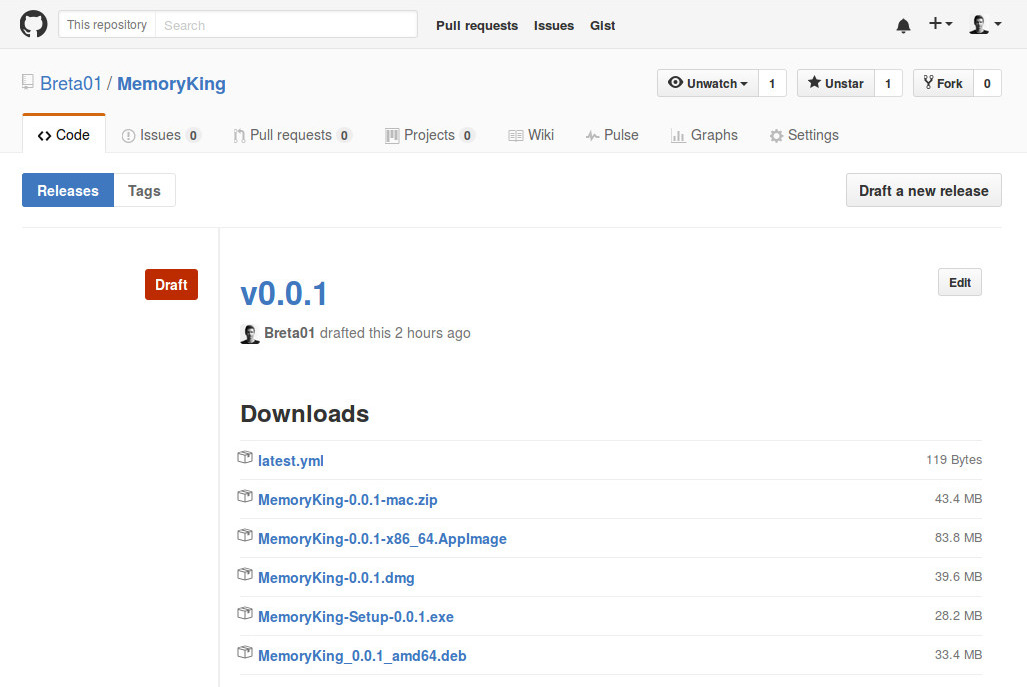
And that’s basically it. This should produce our Windows package and automatically send it to our GitHub draft release.
Travis CI
Travis CI can be setup can be done in a similar way. We only have to include both OS X and Linux (some of the packages may be unnecessary, but it works like this ?) in our .travis.yml file.
As you can see there is no GH_TOKEN variable, but we still need it. So, generate another token or use the old one (it has to be unencrypted). Then go to Travis CI and then to the Settings of your repo. Here you should see an Environment Variables section where you create a new variable with name: GH_TOKEN and value of your token (Don’t worry, the value wouldn’t be included in the public log).
And that’s it! ? You can go and push your first commit and watch your first build. But be patient, because OS X starts really slowly on Travis CI — but it is free.
Conclusion
Setting the electron builder is pretty easy if you have the right travis.yml and appveyor.yml. The only problem is with the code signing, which I need in order to do automatic updates on Mac. But you can sign your code only on Mac and I don’t own one. And I’m not able to get one anytime soon. On the other side, everything else is working correctly ?
Leave a Reply